


OVERVIEW

DESIGN


SCRIPTING
Level Designer/Scripter
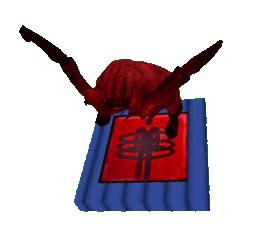
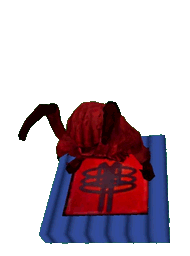
Doppelgängers
Click on the headcrabs to move through sections!
LEVEL DESIGN DOCUMENT
DOWNLOAD LEVEL
MINI PORTFOLIO
SCRIPTING TUTORIAL

LEVEL SUMMARY
DOPPELGANGERS
Game: Half-Life 2:Episode 2
Engine: Source Engine (Hammer editor)
Development time: 2 months

Summary: Doppelgangers is a single player campaign for the first person shooter game Half-Life 2: Episode 2. In Doppelgangers, the player takes the role of Barney, who is escaping a Combine facility with the help of another Resistance member, and a unique weapon known as the Cloner. The level allows Barney to create Clones of himself that he can control for a few seconds. Barney can use the time inside his clone to distract the guards, open doors that are inaccessible to his original body, or access weapons that are in risky locations. Using his clones, Barney has to access locked rooms, release zombies, distract patrolling guards, and risk his life to get out of the dangerous Combine facility.

THE CLONING MECHANIC
-
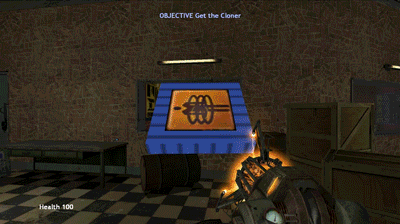
The main mechanic of Doppelgangers is the Cloner, which allows players to create clones of themselves and control for 15 seconds. This futuristic miracle of human research is user-friendly, and players can easily create a Clone of themselves by following the steps below.
Finding a target
-
Want to enter a locked room? Look for an open window and prepare to release the clone!
Players can use the Cloner to access areas that are not accessible at first glance.
Spawning the Cloner
-
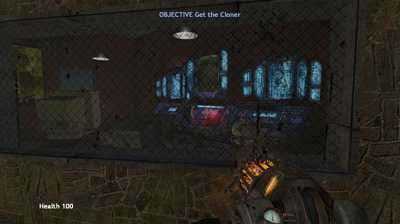
Spawn the Cloner by pressing TAB, and then grab it with the Gravity Gun. The Cloner always spawns in front of the player, wherever he is.
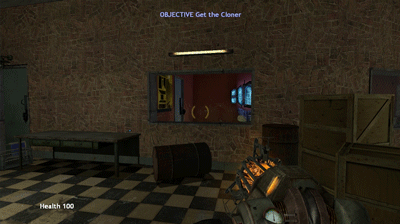
Pressing TAB spawns the Cloner in front of the player
Creating the clone
-
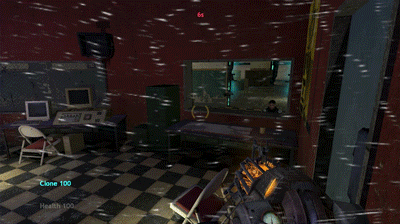
Throwing the Cloner triggers the cloning process. Once players throw the Cloner, a blue overlay tells them that the cloning process has started. Once the clone spawns, a red overlay tells players that they are about to enter their clone's body.
Different colored overlays tell the players about the progress of the clone-creating process.
Controlling the clone
-
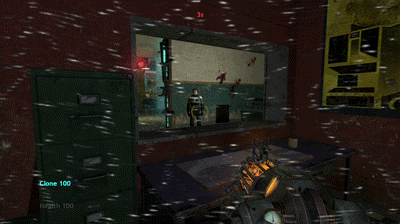
Players automatically teleport to their clone after it spawns. Then, they have 15 seconds to perform any actions while controlling the clone. A screen overlay helps players know that they are controlling their clone.
Players can use their Clone to reach buttons inside locked rooms.
Going back to the original body
-
Once the 15 seconds run out, players go back to their original body automatically. Alternatively, they can go back to their body before the time runs out, by pressing Q. In that case, their clone's body stays in the level, and it can serve as bait to distract enemies.
When the time runs out, players go back to their original body immediately, and their clone disappears with a particle effect.
PROGRESS SHOTS
The Prison
-
The initial layout of the prison was unrealistic, with the character's cell leading straight into the laboratory. During gameplay, the layout changed to imitate the layout of a real prison, with a new corridor that connected several prison cells.


HOVER TO SEE
PROGRESS!
Gameplay milestone vs RTM milestone
The Prison
-
The first encounter with the Cloner confuse players early on, since the Cloner had no instructions on how to use it. To address this issue, later iterations included a glass cage, where players can see the cloning process of a Headcrab after pressing a button. They also include Sam gives players a brief overview of the Cloner's functionality right after they get.


HOVER TO SEE
PROGRESS!
Gameplay milestone vs RTM milestone
-
Initially, the combat tutorial's layout was flat, with the Combine guard covering the machine gun, making it harder for players to see their goal. For the gameplay milestone, the layout changed to give players a full view of the area from the entrance door. Players quickly understood what they had to reach the other side of the room using the Cloner.


HOVER TO SEE
PROGRESS!
Gameplay milestone vs RTM milestone
-
One of the aesthetic challenges of the laboratory was making it look like a real place where people would work. The use of paper overlays, as well as small item props like notebooks, binders and notepads, give realism to the area and the futuristic environment.


HOVER TO SEE
PROGRESS!
Whitebox milestone VS RTM milestone
The control rooms
-
Highlighting the players' goals proved to be challenging early in development. Because players can only see the rooms' interior through the windows, the clutter and plane lighting use to hide the buttons that players had to press. The addition of lighting with more contrast, along with glows to highlight the buttons, fixed the issue during the Aesthetic milestone.


HOVER TO SEE
PROGRESS!
Gameplay milestone vs RTM milestone
The last challenge
-
During the gameplay milestone, players were confused after they pressed a button, since they couldn't see what the button had done in the environment. To address the issue, later iterations included monitors on the wall behind the buttons. In the final version, once players press a button, they see one of the final force fields deactivating, on the monitors in front of them.


HOVER TO SEE
PROGRESS!
Gameplay milestone VS RTM milestone

MINI POSTMORTEM
What went right
What went wrong
-
Had fun scripting the Cloner, which required many creative solutions due to Hammer's scripting system.
-
Allowed players to experiment while learning, which motivated players to find alternate solutions to the puzzles.
-
Created a design language through color coding and other gameplay elements, which made the critical path intuitive and easy to follow.
-
Due to the complex scripting, some mechanics could not be tested until late in the project. This led to unexpected bugs in later milestones.
-
Found out about the unpredictability of source engine's physics too late, which led to the Cloner behaving in undesired ways in rare occasions.
-
Underestimated the work required to use bsp-based decorations, resulting in crunch sessions during the aesthetics milestones.
What I learned
-
The first puzzle to introduce a new mechanic has to be very straightforward. Players can not get creative with a mechanic they don't know.
-
Players shouldn't have to wait long times to use the main mechanic. If a level's mechanics has a timer, give players the option to skip the waiting.
-
Lighting can make the difference between a confusing layout and a great one. Highlighting important gameplay elements, like buttons, paid off.

